What This Loaf Is, and What It Isn't
A sandwich loaf is a different animal from the crusty round boule most sourdough advice is written for. You add a little fat and a little sweetener, you bake it in a pan instead of on a stone, and you end up with a soft, even crumb that holds a slice together under peanut butter. The crust stays thin and tender rather than crackling.
If you came looking for a blistered, open-crumb artisan loaf, this isn't that recipe. That version wants higher hydration, careful shaping, and a way to trap steam around the dough. This one is built to be forgiving: one bowl, one pan, and a timeline you can move around your day.
What You Need Before You Start
Ingredients for one 9-by-5-inch loaf
- 130 g active sourdough starter (about 1/2 cup), bubbly and doubled since its last feeding
- 500 g bread flour (about 4 cups), plus a spoonful for dusting
- 325 g warm water (about 1 1/3 cups), roughly 75 to 80 degrees F
- 28 g neutral oil or softened butter (2 tablespoons)
- 10 g fine salt (about 1 3/4 teaspoons)
- 20 g honey or sugar (1 tablespoon), optional, for a softer crust and deeper browning
If you measure by cups, spoon the flour into the cup and level it off instead of scooping straight from the bag. Scooping packs the flour down, and a stiff dough is the usual result.
Equipment you probably already have
A 9-by-5-inch loaf pan, a large mixing bowl, and something to cover the bowl. A digital scale is worth it for the flour and water, an instant-read thermometer is handy for the final check, and a cooling rack keeps the bottom crust from steaming. That's the whole list. No stand mixer, no dough hook, no proofing basket, no bench scraper, no Dutch oven, and no scoring blade.
Is your starter ready to work?
A starter is ready to leaven a loaf when it doubles in volume within 4 to 8 hours of a feeding, looks domed and bubbly, and smells like yogurt or ripe fruit rather than nail polish remover. If yours was fed yesterday and has already collapsed, feed it again and wait for that rise before you mix. A sleepy starter won't ruin the loaf, but it will stretch every wait in this recipe, and the dough may proof more slowly overnight than the schedule suggests.
The Timeline: Two Ways to Fit This Into Your Day
The hands-on work adds up to about 20 minutes. Everything else is waiting, and most of the waiting can happen while you do something else.
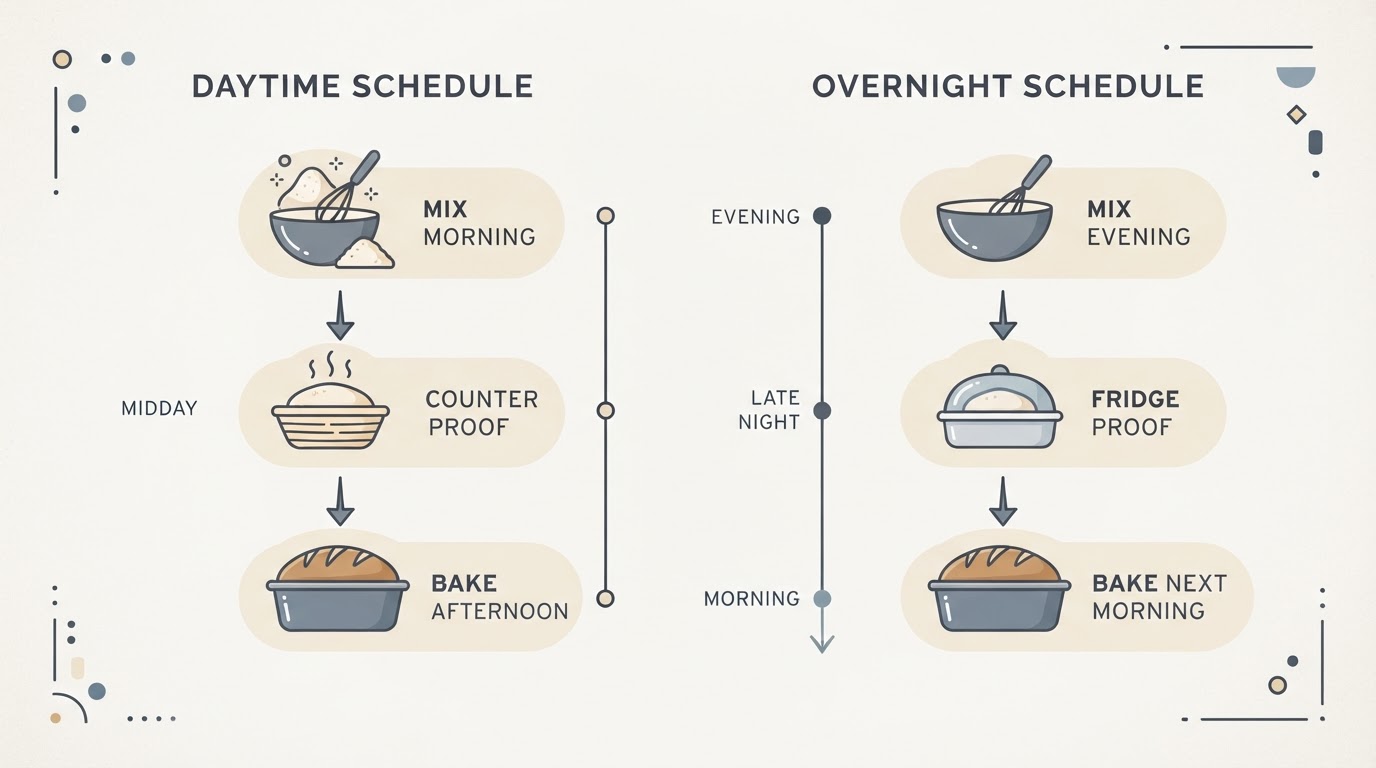
Plan | Mix the dough | Final proof | Bake |
|---|---|---|---|
Same day | Morning, after the starter peaks | 2 to 3 hours on the counter | Afternoon |
Overnight | Evening | 8 to 12 hours in the refrigerator, then 1 to 2 hours on the counter | Next morning |
A warm kitchen pushes every stage toward the short end of its range. A cool kitchen pushes them long, so if your counters run cold, park the covered bowl somewhere a few degrees warmer than the rest of the house and check the dough rather than the clock.
Step 1: Mix the Dough
Weigh the starter and water into a large bowl and stir until the starter loosens into the water. Add the flour and mix with your hand or a sturdy spoon until no dry patches remain. Cover and let it sit for 30 minutes. This rest hydrates the flour and makes the dough noticeably easier to handle.
Add the salt, oil, and honey or sugar if you're using it. Squeeze the dough through your fingers and fold it over itself until everything is worked in, 3 to 5 minutes. The dough will feel soft, a little tacky, and slightly resistant. Don't sprinkle in extra flour just to make it look like dough from a photo. This is a wetter dough than it appears, and that moisture is what keeps the crumb tender.
Step 2: Let It Rise, With Folds Instead of Kneading
Set the covered bowl out of drafts and let the dough rise for 4 to 6 hours. During the first two hours, do three or four sets of stretch-and-folds, spaced about 30 minutes apart. To do one, wet your hand, grab a section of dough from the edge, stretch it upward, and fold it over the center. Work your way around the bowl, then cover it again.
These folds build strength without kneading, and they are why a hand-mixed loaf can still hold a tall shape in the pan. After the last set, leave the dough alone.
The dough is ready for shaping when it has grown by roughly half to three-quarters, looks domed, jiggles when you nudge the bowl, and shows a few bubbles around the edge. If it has doubled and smells strongly of alcohol, it sat a little long. Shape it anyway and keep the final proof short.
Step 3: Shape It Into a Pan Loaf
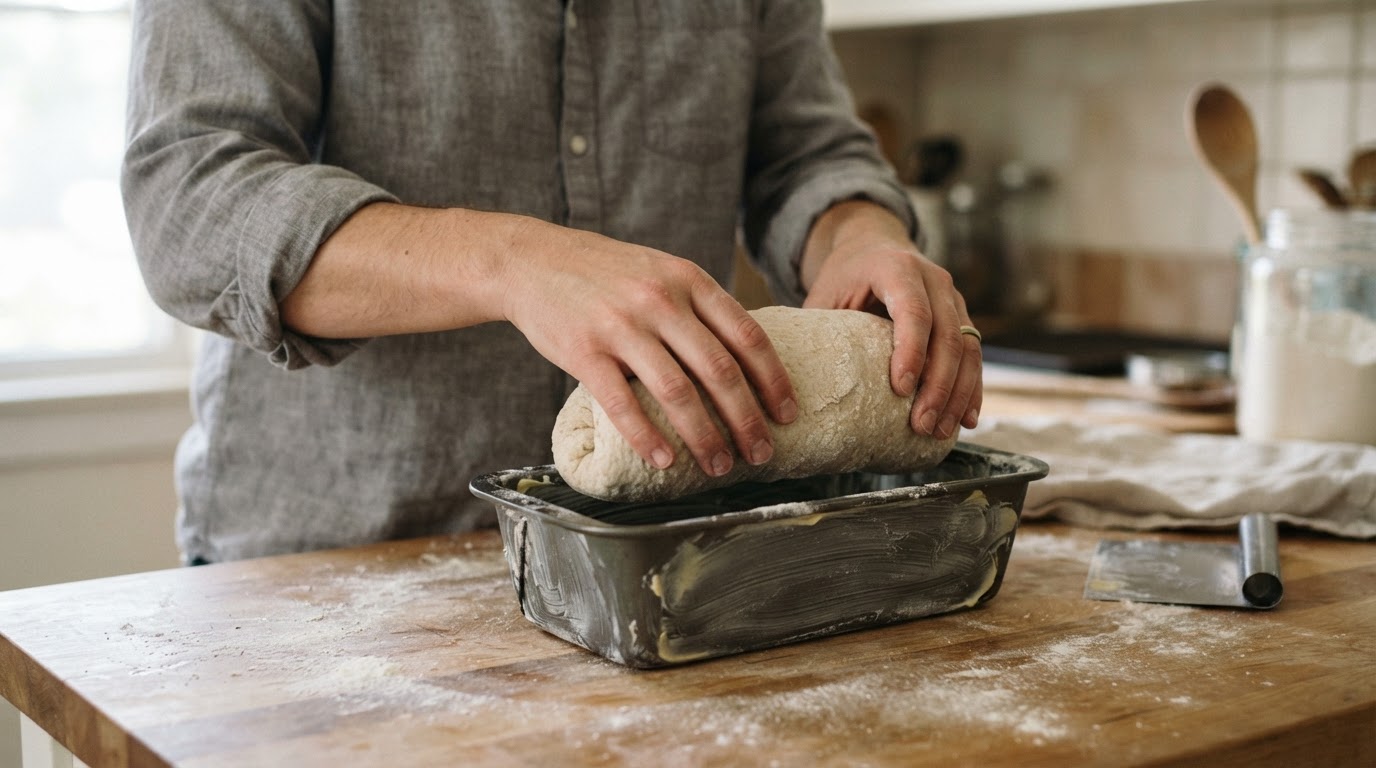
Lightly flour your counter and turn the dough out. Pat it into a rough rectangle about as wide as your loaf pan is long. Fold the left and right sides toward the middle, then roll the dough up from the top edge into a log. Pinch the seam closed and set the log seam-side down in a greased loaf pan.
Pan shaping is the forgiving part of sourdough. The pan holds the sides, so the log doesn't have to be perfectly tight or symmetrical. No scoring is required. If you like the look of a split top, make one shallow slash down the middle with a serrated knife right before the loaf goes into the oven.
Step 4: Proof It, Then Bake It Without Any Special Tool
Cover the pan and let the dough rise until it crowns just above the rim and springs back slowly when you press it with a floured finger. On the counter, that takes 2 to 3 hours. In the refrigerator, it takes 8 to 12 hours overnight, followed by 1 to 2 hours at room temperature before baking.
Heat the oven to 375 degrees F with a rack in the middle and bake for 40 to 50 minutes. If the top is browning quickly, lay a sheet of foil loosely over the pan after 25 to 30 minutes.
A pan loaf doesn't need a Dutch oven or a tray of steam. The pan walls shield the sides, the dough's own moisture steams the crumb from the inside, and the result is that soft, thin crust you want for sandwiches. If you'd like a glossier top, brush the crust with a little melted butter as soon as the loaf comes out.
The loaf is done when the top is deep golden brown, the sides pull away from the pan slightly, and the center reads 200 to 205 degrees F on an instant-read thermometer. Without a thermometer, tap the top: it should sound hollow and feel firm rather than spongy.
Step 5: Cool All the Way Before You Slice
This is the step people skip, and it is the one that decides whether the crumb looks clean or gummy. Bread keeps setting as it cools. Cut into it at 10 minutes and the knife compresses the still-soft center into a smear, even when the bake was perfect.
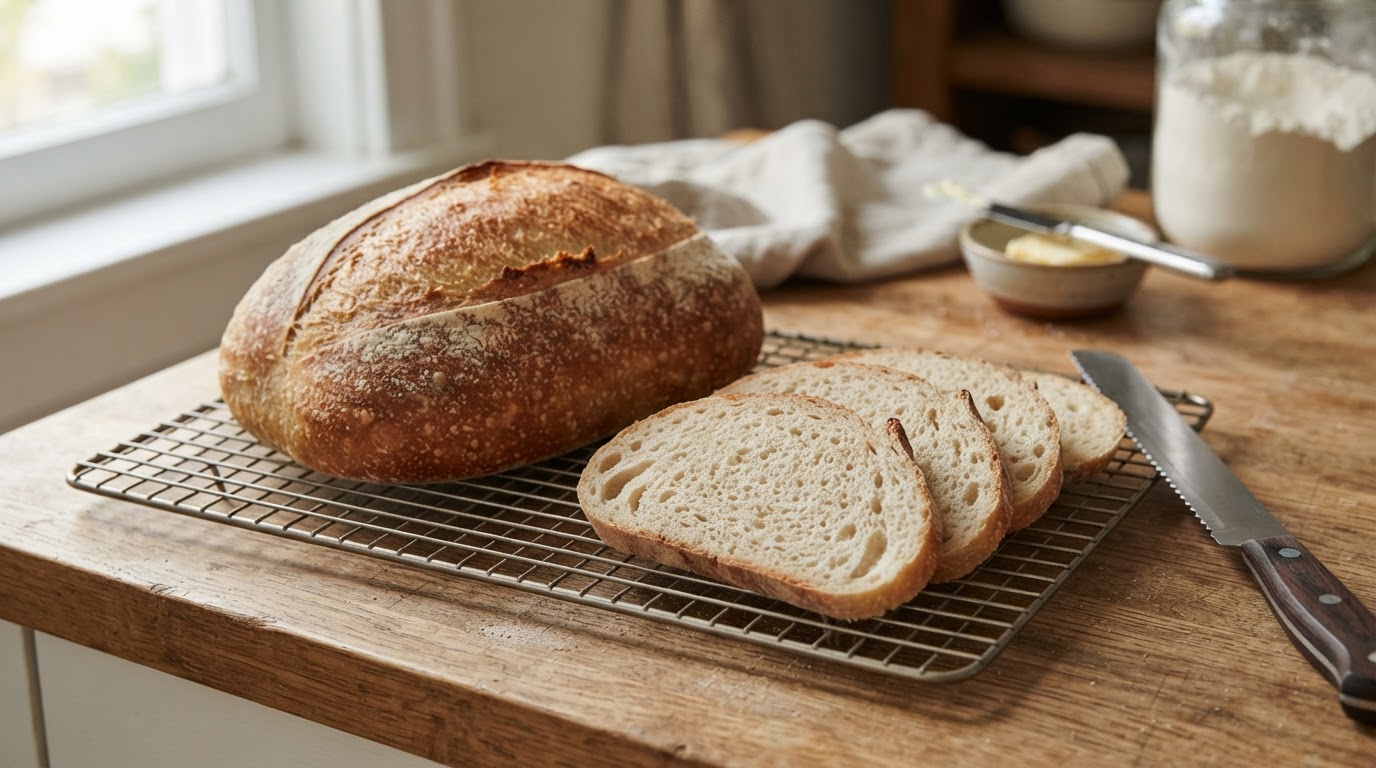
Leave the loaf in the pan for about 10 minutes, then move it to a cooling rack for 1 to 2 hours. It is ready to slice when the bottom feels room temperature. Wait longer if you can; the flavor settles and the slices come out cleaner.
Why This Loaf Trades Crust for Crumb
Every choice in this recipe buys softness by giving something else up, and it helps to know what you're trading.
The fat and the sweetener tenderize the crumb and speed up browning, but they also weigh the dough down. You get even, sandwich-friendly slices instead of the open, irregular holes a lean boule develops. The loaf pan does the same trade from the other direction: it supports the dough so it can rise tall without tight shaping, but it also traps moisture and keeps the crust thin instead of shattering.
Hydration is the third lever. More water means a more open crumb and a more difficult dough to handle. In a pan loaf, extra water usually shows up as a collapsed middle rather than a prettier slice, so resist the urge to splash more in. A long cold proof is the fourth: it deepens the tang, and it can cost you some oven spring if the dough over-proofs in the fridge. If you want a milder loaf, shorten the cold proof to 4 to 6 hours.
When Something Goes Wrong
What you see | What's going on | What to do next |
|---|---|---|
Dense, gummy crumb | Sliced too soon, or the final proof fell short | Cool the loaf completely; next time proof until the dough crowns the pan |
Collapsed middle | Over-proofed, often after a warm final rise | Shorten the counter proof or move the pan to the refrigerator |
Pale, blond crust | Underbaked, or the dough lacks sweetener | Bake longer and add the optional honey or sugar |
Sharply sour flavor | A long, cold final proof | Cut the refrigerator time to 4 to 6 hours |
Tunnels just under the top crust | Too much dusting flour trapped in the folds, or under-proofed dough | Dust lightly and proof until the dough crowns |
No rise at all | The starter wasn't active when you mixed | Feed it, wait for a full doubling, and bake again |
None of these problems means the loaf is wasted. Dense slices make excellent toast, and a collapsed loaf still works for croutons and breadcrumbs.
Make It Yours Without Breaking the Loaf
Small changes are safest the first time you bake this loaf.
- Honey instead of sugar: use the same weight, expect a darker crust, and tent the pan a few minutes earlier.
- Milk instead of up to half the water: a softer crumb, with faster browning thanks to the milk sugars.
- Up to 25% whole wheat or spelt in place of bread flour: a nuttier flavor and a slightly denser slice, plus a splash of extra water.
- A handful of seeds, about 50 g, soaked in warm water and drained: more texture, and a longer rise to plan for.
- 2 g instant yeast: a shortcut that cuts the bulk rise to about 2 hours. You trade some tang for speed, and the starter still does the flavor work.
A Written Version If You Want a Shorter Path
Everything above is a formula you can build yourself, which is the point of the walkthrough. If you would rather follow a recipe with the proportions and timeline already written out, The Rustic Bakehouse keeps a naturally leavened collection led by a soft sourdough sandwich bread made with five ingredients: 260 g active starter, 1,000 g bread flour, 650 g warm water, 55 g oil, and 20 g salt. The published schedule runs 12 to 24 hours from starter check to cooled loaf, and the bake targets 205 to 210 degrees F in the center.
Sourdough tag collection first screen: breadcrumb, H1 'Sourdough', and 4-column sourdough-recipe card grid with pagination.
That is the same dough logic as the formula above, scaled to two loaves and without the optional sweetener. Follow whichever gets you baking sooner. The method in this guide stands on its own, and a written formula is just one less thing to think about on a busy week.
Ways to Use the Loaf Once It Cools
Sandwiches are the point, but a soft sourdough loaf earns its keep in other places too. It makes French toast that soaks up custard without falling apart, grills into a sturdy grilled cheese, and toasts into croutons that hold their crunch in soup. Stale end pieces become breadcrumbs in a blender.
If you bake two loaves, slice one before freezing so you can pull single slices straight from the freezer. And if the first loaf disappears faster than you expected, that is a good sign. Start with one loaf on a day you'll be home anyway, and the second bake will feel twice as easy.